Adding Content Objects
Begin by accessing Content and clicking the ![]() Add Content button. Next you will select the type of Content you wish to post.
Add Content button. Next you will select the type of Content you wish to post.
All content objects created here will be posted within the Content "Tree" in the left navigation. Those objects created using other tools will be posted, and accessed, within their individual tools as well.
Upon creation, the content object will open up to the General Settings tab. Use the other tabs assign any additional General Settings, Availability Settings, Access Control or Gradebook settings (if Gradable).
If you are linking to the File Manager, you have the option of locating an existing file, creating a new web page, or uploading the file as you create the content.
- Link to an Existing File - Link by selecting a file that has already been uploaded to the File Manager.
- Upload and Link a File - Use the 'Add' button to upload the file to the File Manager and link to Content at the same time.
Typically, you must add up to two pieces of information to create a new content object. It is encouraged that you assign your content some of the additional settings available. The more settings that are added to a Content Object, the better the course experience is for the student. Review the Help Pages for individual tools for more information on entering settings for content objects.
Content Object Types
Content
![]() Folder - Create a folder to organize your content in a way that suits your needs.
Folder - Create a folder to organize your content in a way that suits your needs.![]() Page - Add an Information Block.
Page - Add an Information Block. ![]() File - Upload Zip, Word, Excel, graphic files or create an html content page.
File - Upload Zip, Word, Excel, graphic files or create an html content page.![]() Link - Add a link to an internal or external file.
Link - Add a link to an internal or external file.![]() Multi format - Used when uploading different formats of the SAME file.
Multi format - Used when uploading different formats of the SAME file. Panopto Queue - Used to process Panopto recordings but is only available when there is a an uploaded recording that is ready to be processed.
Information
![]() Announcement - Add an Announcement.
Announcement - Add an Announcement.
Communication
![]() Chat - Add a Chat Room.
Chat - Add a Chat Room.![]() Discussion - Add a Discussion board.
Discussion - Add a Discussion board.
 Forms - Add a Form.
![]() Journal - Add a Journal.
Journal - Add a Journal. Signup List - Add a Signup List.
![]() Media - Add a Media file.
Media - Add a Media file.
Assessment
 Assignment - Add an Assignment.
 SOLE Exam - Add a SOLE Exam.
![]() Survey - Add a Survey.
Survey - Add a Survey.![]() TurnItIn - Add a TurnItIn assignment.
TurnItIn - Add a TurnItIn assignment.
View
Administrators in SOLE can change views to emulate other roles available in the course or site.
To change you view, select the "Administrators" drop-down box at the bottom of the left navigation panel.
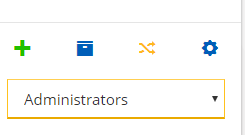
Select the option to "View SOLE as" a particular role. After selecting, the course is view-able in the selected role.
Administrators may emulate the views of a variety of content, however no assessment scores or submissions will be equated in the gradebook.
To resume editing of course, return back to "Administrator's" view.